How To Integrate Gitlab with Microsoft Visual Studio
A quick guide on how to integrate Gitlab with Microsoft Visual Studio.
- Requirements
- Creating a Gitlab Project
- Setting Up Gitlab in Microsoft Visual Studio
- Push our project from Visual Studio to Gitlab
- Update changes in Visual Studio to Gitlab
- Takeaways
I have explained in one of my blog posts on how Gitlab can be a useful tool for a team of software developers to manage a single software project from anywhere on the earth efficiently. However, if you are a student, Gitlab can also be used as your project repository, where you can keep track on your programming coursework, and at the same time, use it as a backup. In this short tutorial, we will learn how to integrate Gitlab with Microsoft Visual Studio, where we will synchronise an ASP.NET web project between our workstation and Gitlab.
Requirements
- Microsoft Visual Studio (I am using the 2019 version). See here on how to download and install.
- Gitlab. Create an account here.
Creating a Gitlab Project
- Login to our Gitlab and click the New Project button in the upper right corner of the page.
-
Give a name to our project (e.g.
ASPNetTutorial) and click on Create Project. We can describe the project but it is optional.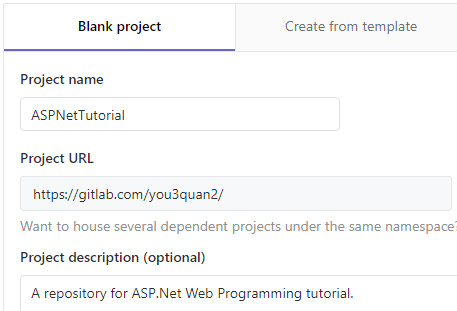
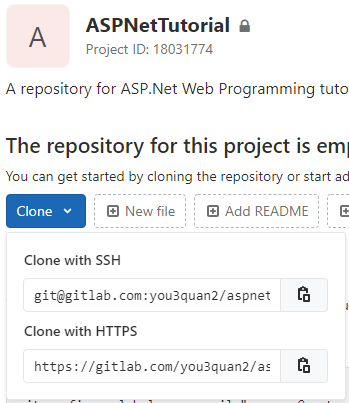
- We will be redirected to the project page. This project should be empty. Click on the down arrow in the Clone button and copy the URL under Clone with HTTPS and paste it somewhere else (e.g. a text file). We will need this URL later.
Setting Up Gitlab in Microsoft Visual Studio
-
Open/Create a project using Microsoft Visual Studio. If you are not sure how to do this, then please refer to this link.
-
Once the project is ready, go to the top of the Visual Studio and click on File → Add to Source Control.
-
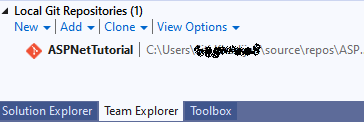
If we do not have the Team Explorer opened, then click on View → Team Explorer. Within the Team Explorer, we are supposed to see our project under the Local Git Repositories.
Push our project from Visual Studio to Gitlab
-
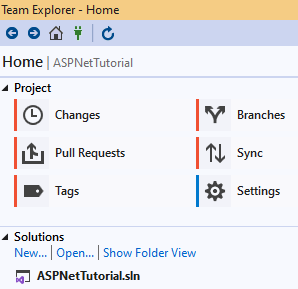
Double click on our project under the Local Git Repositories and we will get to the Team Explorer - Home:
-
Click on Settings and set up our User Name and Email Address. This information is used to identify us as the author of the project.

-
Go back to Team Explorer - Home by clicking on the Home icon button. Now, click on Sync and go to Push to Remote Repository. Key in the URL which we have copied from our Gitlab account earlier (e.g.
https://gitlab.com/you3quan2/aspnettutorial.git) and click on Publish.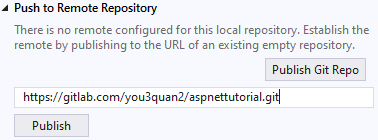
-
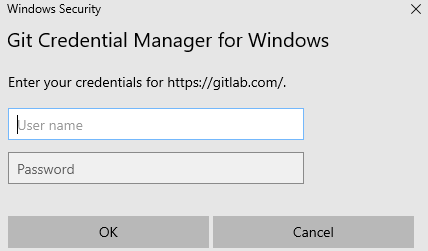
We will be asked to enter the User name and Password for our Gitlab’s account.
-
Visit our Gitlab account again and check on the empty project which we have created earlier. We are supposed to see the ASP.NET project which we have created in this Gitlab project’s repository.
Update changes in Visual Studio to Gitlab
Now, we have the same project in our Visual Studio and Gitlab. But, we still need to update the Gitlab’s project every time we made changes on the project in Visual Studio. I will show you an example of how we can do this.
In my ASPNetTutorial project, there is a Home.aspx file which contains the following codes:
<%@ Page Title="" Language="C#" MasterPageFile="~/Site1.Master" AutoEventWireup="true" CodeBehind="Home.aspx.cs" Inherits="ASPNetTutorial.Home" %>
<asp:Content ID="Content1" ContentPlaceHolderID="head" runat="server">
</asp:Content>
<asp:Content ID="Content2" ContentPlaceHolderID="ContentPlaceHolder1" runat="server">
    <h2> This is my HOME page. </h2>
</asp:Content>
I updated my Home.aspx file and added (GitLab Test) to <h2></h2>:
<%@ Page Title="" Language="C#" MasterPageFile="~/Site1.Master" AutoEventWireup="true" CodeBehind="Home.aspx.cs" Inherits="ASPNetTutorial.Home" %>
<asp:Content ID="Content1" ContentPlaceHolderID="head" runat="server">
</asp:Content>
<asp:Content ID="Content2" ContentPlaceHolderID="ContentPlaceHolder1" runat="server">
    <h2> This is my HOME page (GitLab Test). </h2>
</asp:Content>
To update these changes, I perform the following steps:
-
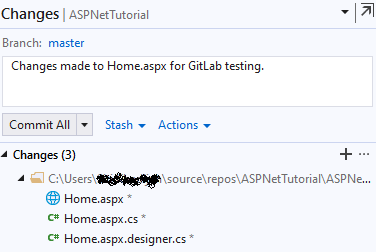
Go to Team Explorer - Home and click on Changes. If we have made changes to our project, we will see a list of files which are affected by the changes we made under Changes. Under Branch: master, key in a commit message (e.g.
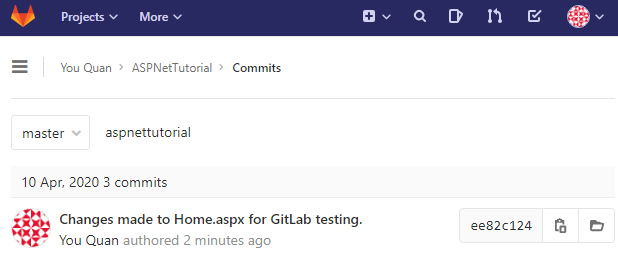
Changes made to home.aspx for Gitlab testing). Click on Commit All.
-
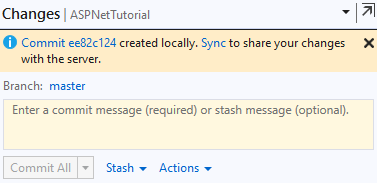
We will see a message as follow. Click on Sync so that the changes we have made will be reflected in our Gitlab’s project repository.
Go to the Gitlab account and check on the specific file which we have modified. We are supposed to see the changes which we have made. If we click on the History button, we will see our commit changes:
Takeaways
By now, you should know how to setup your Visual Studio and Gitlab to push your project from your workstation to Gitlab.
I hope you found this tutorial helpful. Have more questions about this? Let me know by commenting below!