How To Add Bootstrap In ASP.NET
A quick guide on how to add Bootstrap in ASP.NET.
If you have learned basic web design, then you must know about Cascading Style Sheets (CSS). Commonly, your web project will have a .css file, which defines the design of your web pages. For example, if we want to have a button with a green background, we need to have a .css file which defines the style of the button:
.button {
  background-color: #4CAF50;
  border: none;
  color: white;
  padding: 15px 32px;
  text-align: center;
  text-decoration: none;
  display: inline-block;
  font-size: 16px;
  margin: 4px 2px;
  cursor: pointer;
}
Note: This CSS code is from the w3school CSS tutorial.

However, the task of creating a button like this can be simplified with the use of Bootstrap. Bootstrap is a free and open-source CSS framework which contains CSS-based and JavaScript-based design templates for various interface components, including the button which we want to create. For example, with Bootstrap, we just need to define the class (e.g. btn-success) of the button in our .html page (or .aspx for ASP.NET):
<button type="button" class="btn btn-success">Success</button>
The Bootstrap documentation provides a comprehensive guide for us to create almost all the design which we can think of.
To unleash the power of Bootstrap in our ASP.NET web application, we can add Bootstrap package to our ASP.NET web project by following these steps:
-
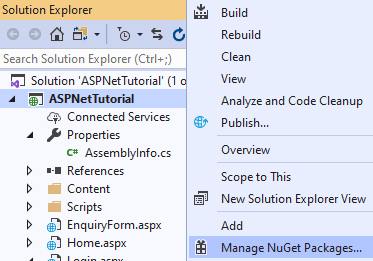
In the Solution Explorer, right click on the project (e.g. ASPNetTutorial) and select Manage NuGet Packages.
-
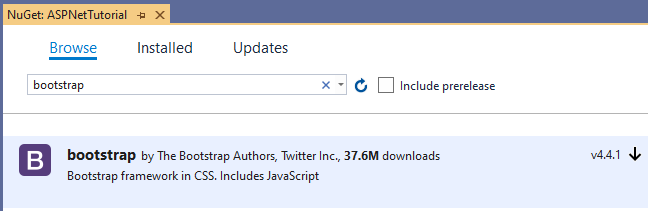
Under the NuGet window, click on Browse and search for Bootstrap using the Search. Once we get the Bootstrap package, click on ↓ to add the package to our web project.
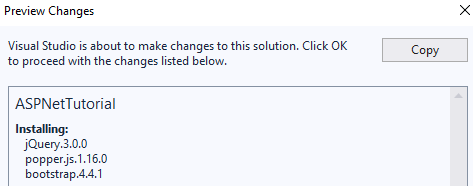
- We will be asked to confirm the installation, where the following files will be added into our web project:
- jQuery.3.0.0
- popper.js.1.16.0
- bootstrap.4.4.1
-
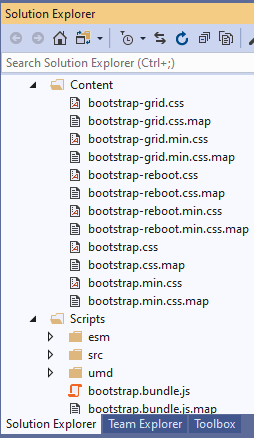
If the installation is successful, we will see multiple files (
.css,.map,.js) added to the Content and Scripts folder under our web project.
- Drag-and-drop these three specific files from the Content and Scripts into the
<head></head>section of the web page where we want to code with Bootstrap (I have added it to theLogin.apsxwhich we have created in the very first tutorial).- bootstrap.min.css
- jquery-3.0.0.min.js
- bootstrap.min.js
<html> <head runat="server"> <title></title> <link href="Content/bootstrap.min.css" rel="stylesheet" /> <script src="Scripts/jquery-3.0.0.min.js"></script> <script src="Scripts/bootstrap.min.js"></script> </head> <body> ...other codes... </body> </html> -
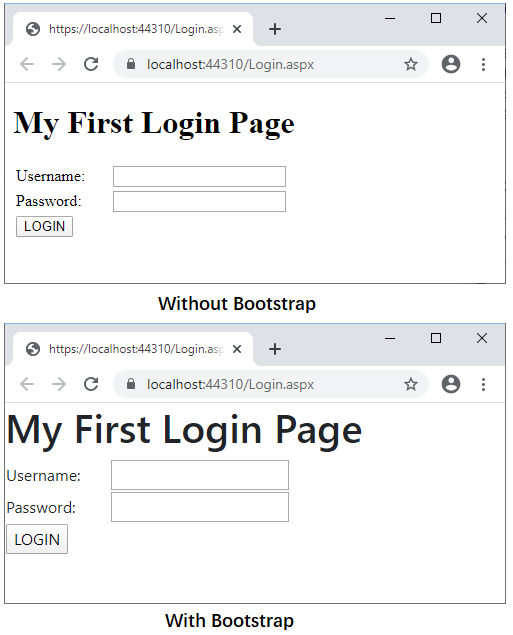
To check if we have added the Bootstrap correctly, run the web project and we should be able to spot the differences in the Login page:
-
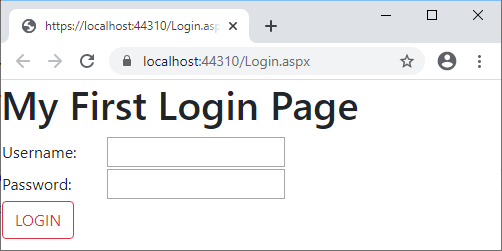
If the differences (e.g. font and size) are not obvious for you, let’s add a Boostrap class to the Login button:
<asp:Button ID="login_button" class="btn btn-outline-danger" runat="server" Text="LOGIN" />Now, run the project again and hopefully, you can notice how the design of the Login button had changed:
If you want to explore more about web programming with ASP.NET, I will recommend you to refer to this tutorial, which shows you how to create a Master page in ASP.NET and develop a navigation bar for the Master page using Bootstrap.
I hope you found this quick guide helpful! If you have more questions about this tutorial, please let me know by commenting below.